This website is still in development.

Floating status pet for Kiro

Kiro Buddy

A cute desktop companion that reacts to Kiro agent activity: working, asking for input, done, errors, and spec-driven design phases.

Unofficial community project made by Jagatees. Kiro Buddy is not assigned, sponsored, endorsed, or maintained by AWS.

Kiro Working
Kiro Working animated Kiro Buddy sprite
Prompt is running000
Working

Kiro starts thinking

Asking

Waiting for your input

Done

Agent run completed

Spec phases

Design, Requirements, Task List

Kiro IDE Buddy

A small visual signal for long agent runs.
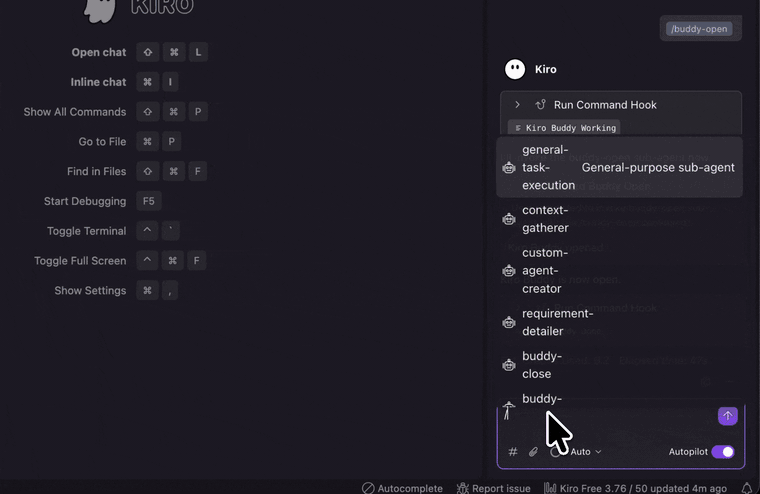
Use this area for a Kiro IDE screenshot or short GIF showing Buddy changing from working to asking to done while Kiro is running.

Placeholder: Kiro IDE screenshot / GIF

Drop your final asset here later.

Terminal Buddy

Terminal sessions get their own Buddy window.

Use this area for a terminal video or GIF showing Kiro CLI hooks opening Buddy and updating status during a run.

Placeholder: macOS CLI video

Drop your final asset here later.

Kiro IDE setup

Install Buddy for Kiro IDE.

Use this path when you work inside the Kiro desktop app on macOS. Install Kiro IDE and Node.js LTS first, then run the Buddy installer from your project folder. Slash commands are typed inside Kiro IDE chat, not in your terminal.

MacBookReady now

macOS Kiro IDE setup

Make sure Node.js is available, run the installer from your Kiro project folder, then use Buddy slash commands inside Kiro IDE.

macOS Kiro IDE setup walkthrough
macOS Terminal
$ node -v
$ npm -v
$ cd ~/my-kiro-project
$ npx -y @jagatees/kiro-buddy install

Run inside Kiro IDE chat

Kiro IDE chat
> /buddy-open
> /buddy-test
WindowsComing soon

Windows Kiro IDE setup is coming soon.

Windows instructions are temporarily hidden while the setup flow is being updated. For now, Kiro Buddy is available for macOS.

Kiro CLI setup

Using Kiro from Terminal? Install Kiro CLI before Buddy CLI hooks.

This path is only for macOS Kiro CLI users. Install Node.js LTS, install Kiro CLI, run `kiro-cli login`, then add Buddy CLI hooks inside your project folder. Use `kiro-cli chat --agent kiro-buddy-cli` for the normal terminal flow, or `cli run` when you want each terminal session to get its own Buddy window.

MacBookReady now

Mac Terminal Kiro CLI setup

Install Kiro CLI on the Mac first, then log in and run the Buddy CLI hook installer from your project folder. Open Buddy once, then run Kiro CLI with the Buddy agent enabled.

macOS Kiro CLI setup walkthrough
macOS Terminal
$ kiro-cli --version
$ kiro-cli login
$ mkdir -p ~/my-kiro-project
$ cd ~/my-kiro-project
$ npx -y @jagatees/kiro-buddy cli install
$ npx -y @jagatees/kiro-buddy cli open
$ kiro-cli chat --agent kiro-buddy-cli

MacBook result

  • Kiro CLI discovers the `kiro-buddy-cli` agent config.
  • Buddy opens when the terminal agent starts.
  • Buddy switches between working, asking, and done.
  • `cli run` is available for one Buddy per terminal.
WindowsComing soon

Windows Kiro CLI setup is coming soon.

Windows terminal instructions are temporarily hidden while the setup flow is being updated. For now, use the macOS setup path.

Global command

Install once globally for shorter commands.

This is optional. Use it if you prefer `kiro-buddy` commands instead of running `npx -y @jagatees/kiro-buddy` every time.

Terminal
$ npm install -g @jagatees/kiro-buddy
$ kiro-buddy install
$ kiro-buddy cli install
$ kiro-buddy cli open

Desktop companion

A small floating Buddy stays on top while Kiro runs, so agent state is visible without checking logs.

Hook powered

Install writes Kiro Agent Hooks, slash agents, and a status runner into the current workspace.

Phase aware

Buddy can show working, asking, done, error, and spec-driven Design, Requirements, or Task List states.